Saturday, July 6, 2019

Helical Pile Installation

Delivery of the Helical Piles

Progress on the house was on hold as we awaited the arrival of the helical piles from Goliath Tech.  After months of waiting, we were told that they would be delivered on Tuesday, then it was put off until Wednesday.  The crew from Hauser arrived that day to review and mark the pile placement and help with the unloading.  There was excitement in the air as we waited and waited for the truck to arrive.  


The truck finally showed up after 4pm.  It was a huge truck that had come all the way from Ontario Canada. 

Our load was the last delivery for this truck and was in the far back with no way to move it out.

Hauser had their bobcat with them and were able to use it to drag the pallets from the truck.  Here they are pulling out the motor that will be used to install the piles.  They got lucky as it fell right into the front end loader!!
https://youtu.be/NpUfGhha6I8

Now they are getting the piles from the back of the truck.
https://youtu.be/jaX0AQ7SBaI

And this is how they got them out of the truck.
https://youtu.be/iU8tywmeA_Y


As the large truck finds its way out of the neighborhood, the crew has the weighty task of moving the last of the piles onto the property.  Once again the tractor came in handy as these things weigh a ton, figuratively speaking.

Once all the piles were on the property, the crew went home with plans to return the next day to install the piles.  Roy, my contractor from Hauser, was hopeful that we could install the piles in a day or two.  I can't wait!!  BTW, this is Roy's first experience with helicals.


Here is the time lapse video I took of the day.  I didn't have my grandson to help me edit it, so it isn't enhanced.  You can always speed it up, if you want.  I love watching the clouds come and go.      
 https://youtu.be/qCYoUxS7sZg


Installation of the Helical Piles

It was another beautiful day in Half Moon Bay.  A day full of promise.  A day I had waited years for--one of the most important steps in the process of building a house--putting in the foundation.  The first workers showed up a little after 9 am, others came later.  James from Taynr drove here from Sacramento, Roy from Hauser arrived after checking in on other job sites, and Richard, the expert from Goliath Tech, flew up from Irvine.  In spite of all the experienced and responsible people present, the install didn't go quite as planned.  


The day started with the crew assembling the equipment.  Hauser had dropped off their Kubota tractor the previous day.  The scoop, which had been useful in unloading and moving the piles, was removed from the tractor.  

The scoop was replaced with a TPE, a telescopic piping and drilling extension.  Aren't you impressed by my knowledge of technical terms?!

The high torque hydraulic motor was then mounted to the TPE.  A gauge was attached so that the torque could be measured while the pile was being inserted into the ground.

A plate was attached to the hydraulic motor, which in turn was attached to a helical pile.  They chose the largest pile to install first.  The first problem they encountered was the pile would not go through the hard packed base rock.  They solved that problem by breaking through it with hand tools.

The pile is finally going into the ground.  Looks good, right? 


I don't have any pictures after this because I couldn't watch.  I could see the pile wasn't going in straight and it drove me crazy.  Later I asked Richard about this and he said it wasn't a problem--that they could fix it with shims.  After the first pile, they did do 2 things to make the work go easier.  First, they put an auger on the end of the tractor arm and drilled pilot holes through the base rock, and second, they rented a larger tractor to install the piles.  Both of these things helped and the install proceeded more quickly.  

But as the piles were being installed, it because apparent that parts were missing--including many of the piles.  The other important missing pieces were some of the plates used to attach the hydraulic motor to the piles.  Since the piles are different sizes, they needed different size plates.  This meant that the workers couldn't even install all the piles that were on site.  

James stayed after everyone left to do an inventory so he could contact the suppliers and rectify the problems.  He says it could be weeks until we get all the parts we need.  

The next day 3 workers came back to finish installing what they could.


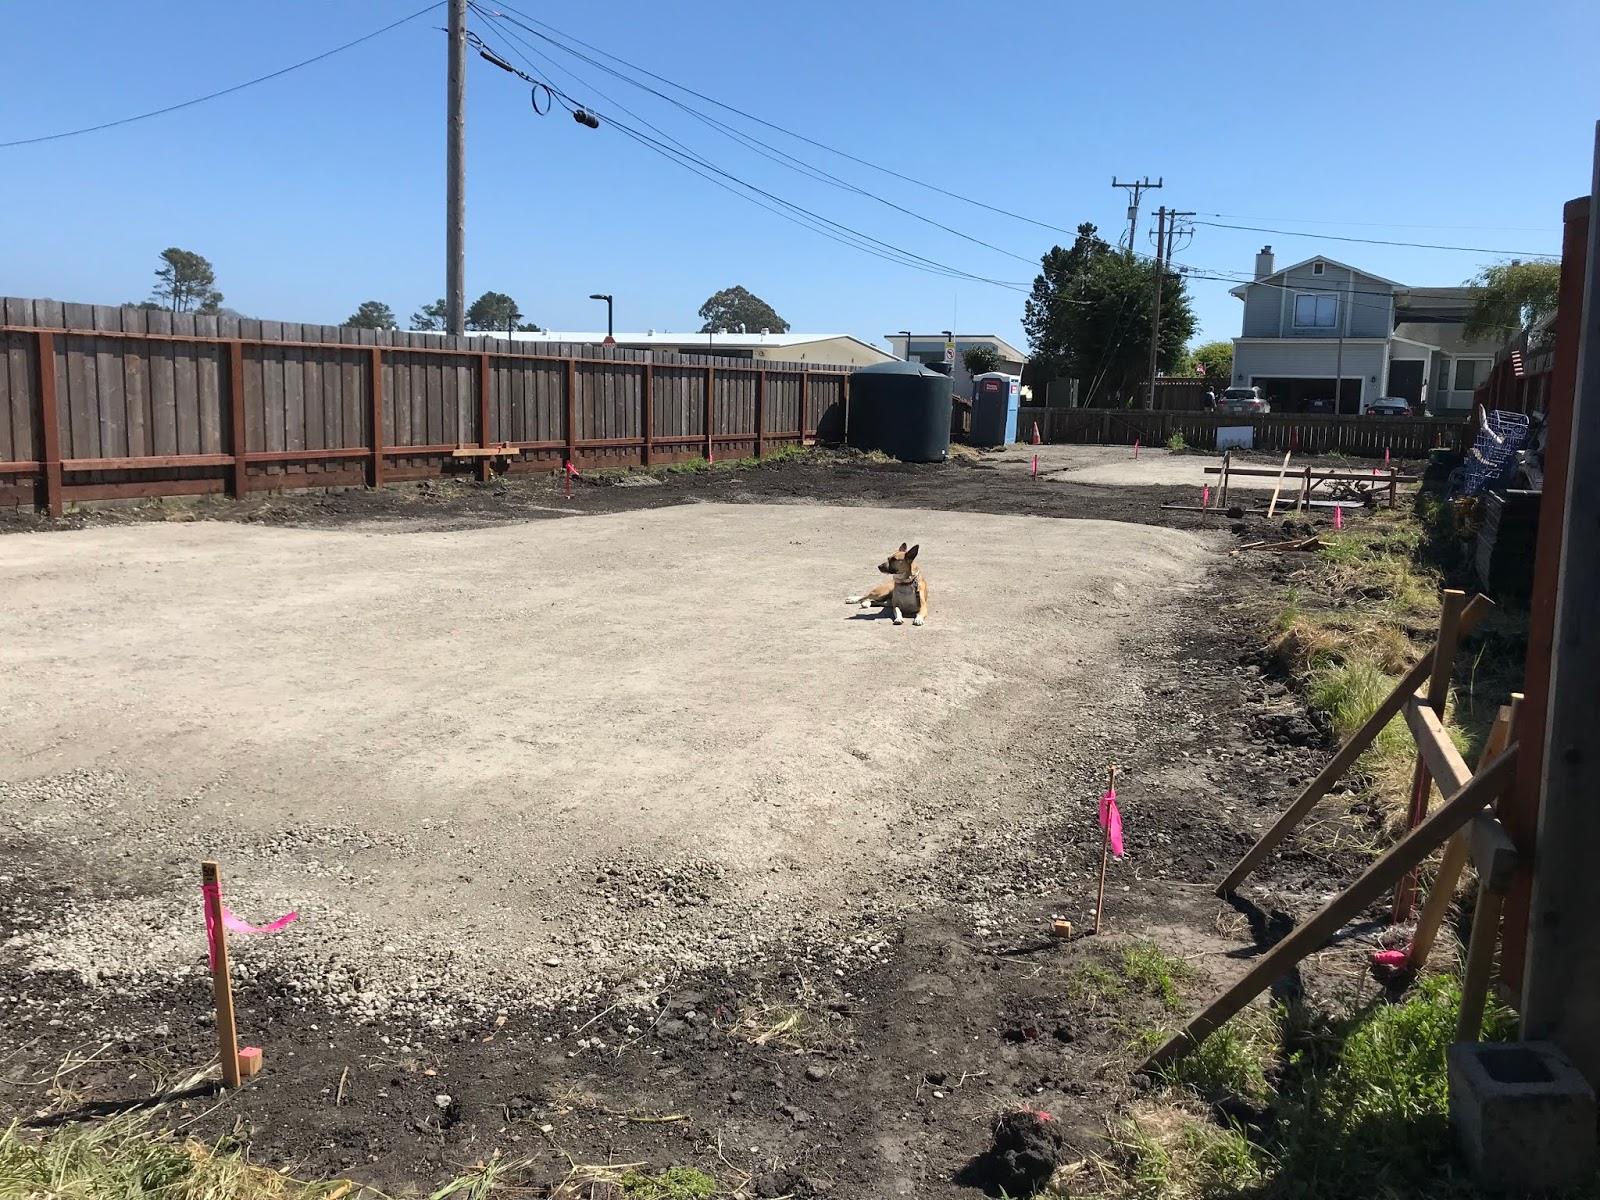
This is how the lot looked when they left and how it looks now--a week later--an abandoned worksite. 

Here are the time lapse videos I took of the 2 days.  Day one is especially long because I set the camera to take more frequent pictures.  I was thinking that I wanted to get all the detail I could because it was such a special day.  I don't know how to speed it up in the editing process, so you will just have to speed it up on your own.  The video of the second day goes very quickly because I changed the settings.  It was also a shorter work day.  Richard is the guy with the hard hat.

https://youtu.be/xHeVexylgW0

https://youtu.be/AuBmbmNBAPI

Needless to say I was extremely disappointed and disheartened.  It wasn't just the missing parts that upset me, it was also the quality of the work.  I like things plumb and level and the only leveling tool on site was one plumb bob.  I was too depressed to write a blog and spent much of the weekend learning more about helical piles.  It didn't make me feel better when I read how important it was for the piles to be plumb.  

I love the idea of helical piles.  They should save a lot of time and definitely save on excavation, dirt removal and concrete.  (In case you didn't know it, concrete is very bad for the environment.)  Helical piles were first used in 1836 to support a lighthouse in the water.  Apparently there is no patent for them, so they are made by many companies with slightly different configurations.  Some even have square shafts rather than circular.  While they can be used for buildings up to 5 stories tall, they are mainly used for smaller jobs like decks, additions, and fences.  I've heard it said that they aren't used a lot because they are very expensive, but it my case they were a lot less costly than the original foundation design.

The sizes of the helical piles are determined by an engineer using the soils report and structural specifications.  The soils report for my lot said that the piers needed to be at least 12' deep.   All the piles were engineered to be 14' in length with the diameter and thickness of the metal varying by the load they support.  The piles come in 7' sections.  Once the first pile with the helix is installed, another 7' pile is bolted on and then they are screwed the rest of the way into the ground.  The torque is tested to make sure it is equal to or greater than specified.  If the torque doesn't meet the specifications, another piece is attached and the pile is inserted deeper.  They could go down as much as 100 ft.  I guess the engineer didn't anticipate the need to go deeper on my foundation because no extra piles were included.

Once the piles are in the ground, plates are welded to the tops for the structure to sit on.  This is a very critical step because they have to be level and in exactly the right spot.  In my admitted inexperience I don't see how they can make it work with the piles installed as they are.   In particular the first pile is far from plumb.  James is also concerned about it and thinks it needs to be reinserted.  The other piles are a lot better regarding plumb but it is hard to tell about the placement.  I just have to trust that it will all work out in the end.  I know James is working very hard to make it happen.  I trust him and feel better after talking with him.

Like every other step in this process, things didn't go as expected.  It is definitely a learning experience.  I'm not only learning about construction, but also patience and tolerance.  And it isn't just me that is impacted, it messes with all the contractors' schedules.  I feel sorry for them, but as James said, it is one of the challenges of the business they chose to be in.

Monday, June 24, 2019

Second look at containers


The only activities on site in the last 2 months were the weeds growing, the gophers digging and, of course, Juno running around.  The main hold up was a manufacturing issue with the 10" helical piles, but that has been resolved and all the piles are due to be delivered and installed this week!!   I've got my time lapse camera ready to go so I can make another fun video.
Meanwhile, work has been progressing off site at the TPU location in Vallejo.  James arranged a time last week for us to meet and get a close up view of the work that is being done.  I invited a friend, Lindsay, to join me on the drive.  


We were met by James, Michael, Randy and Abel.   Randy Larson is the president of TPU, Michael showed us around last time in Randy's absence and Abel works for Taynr.  Lindsay took the picture.
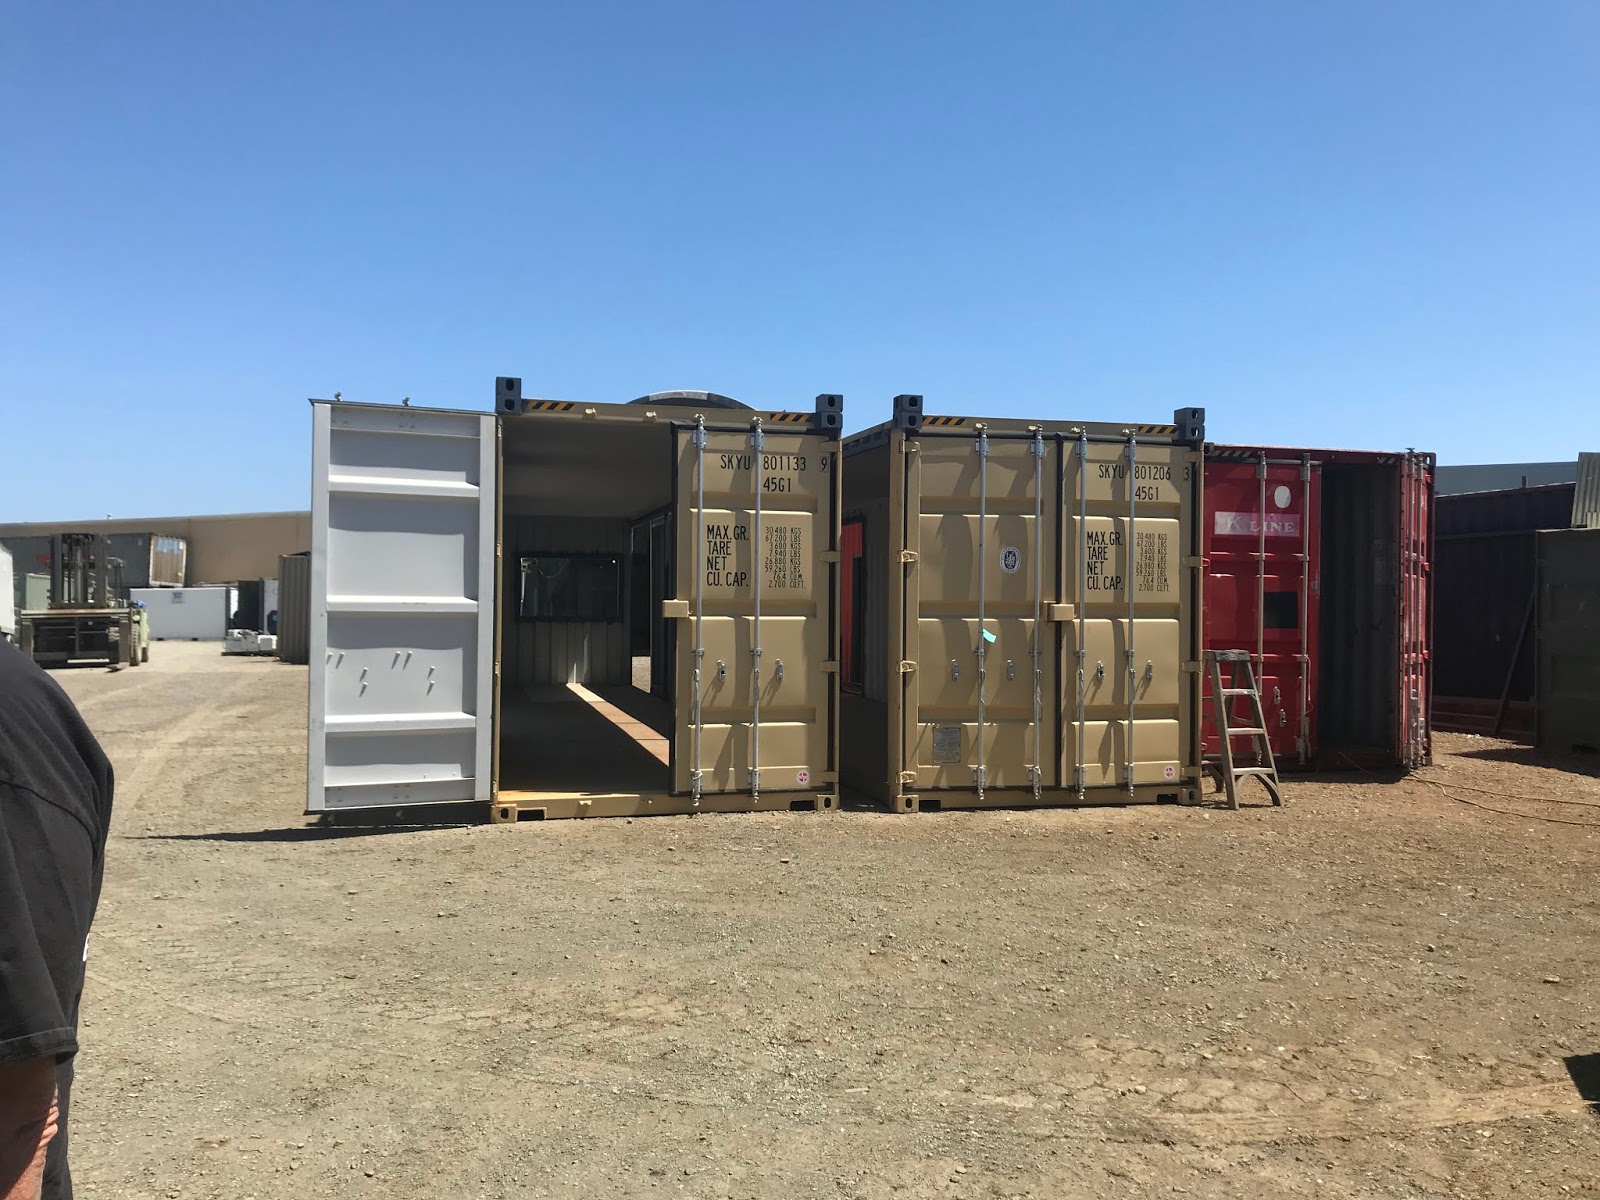
My house-to-be was in pieces scattered around the yard.  At one point I got turned around and thought I was looking at someone else's containers and noticed how they looked just like mine.  Here are the two 20 foot containers that will be the studio apartment.  They are sitting side by side, but unattached, as that comes after delivery to the site.
  
Here is a shot out the upstairs south facing bedroom window looking at the west facing side of the downstairs units.  This is a view you could never get in conventional construction.

This is a shot of the containers which will be the upstairs of the main house.  In place of the container doors, there will be sliding glass doors.  As we looked at them, James told me I have the option of leaving the container doors on and welding them open--expanding the indoor space into the outdoors.  I don't think this would work well upstairs because of the deck, but I will give it some thought for the downstairs.
The container in front is the downstairs bedroom and behind it are the upstairs units.


Going inside the containers was another interesting experience.  Here we are in the upstairs bedrooms and baths.  The openings for the windows and doors have been cut from all 7 containers and have been reinforced with steel.  My first impression was how big the openings were, but then I had to remind myself that the windows that go in will have frames so the actual glass portion will be smaller.  The other confusing part is that the interior walls that are not part of a container have yet to be installed.  Lindsay and Abel are standing in the hallway, but the hall will not be that wide.  There will be a wall in front of them.

Here we are in the downstairs of the main house.  As you can see, it is a large open space--living room, dining and kitchen at the back.  The supports in the middle of the room are temporary and will be replaced with ceiling beams on site.


Being inside the containers allowed us to make some important decisions.  Here is James in the downstairs bedroom/bath.  He is marking out the location of the shower, toilet and cabinets.  In the original plans, there was little room for a sink and cabinet because the shower was so big, but by making the shower narrower I am able to have a full size vanity.


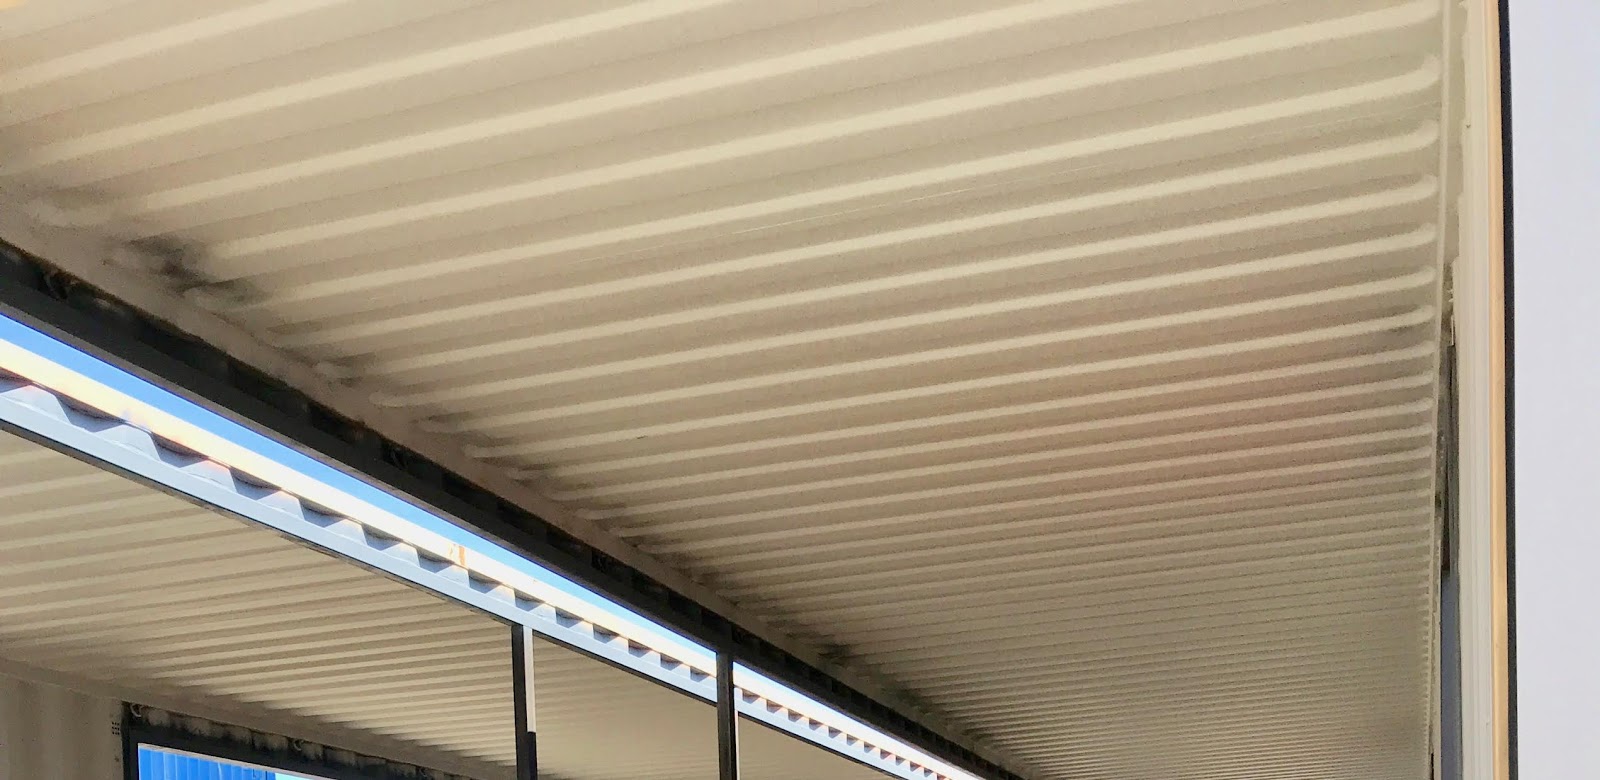
An option came up that I had long since given up on and that was the possibility of leaving exposed the original metal container ceilings.  The alternative is to frame up the ceiling and put on drywall as in a conventional house.   By leaving out the drop down ceiling, the room height will be greater, there is a savings on material and labor, and the look will be unique.  The electrical wiring that would normally be there will go above the container roof.  BTW, the container roofs will be covered--the downstair containers will be covered by the upstair containers and the upstair containers will be covered by insulated roofs.


Another benefit of seeing the units first hand was we were able to catch mistakes.  Before we even arrived, James had noticed that a window was placed too high.  It is the window over the sink in the studio and it is too high to see out, which is not what I wanted.  The solution was simple--just bring the bottom down and make the window taller.  He had this correction made before I had returned home.

There was another mistake that I noticed right away.  The man door next to the kitchen and leading to the backyard, was not where it was supposed to be.  This greatly affects the kitchen design and has to be fixed.  I have no idea how they will fix it, but I'm sure they'll do a proper job of it.  My guess is they could remove the back panel from that container and put on a new one.

Where the containers come together, the seam is not flush with the walls.  I knew there was to be a plate on the floor that will have to be allowed for when the floors are laid, but I did not have a clear understanding about how the walls went together until we were there.   The union projects into the room.  For the most part this doesn't matter, but one joint lands in the middle of the kitchen counter.  I mentioned my concern to James and he said that wouldn't be a problem--the cabinet could just be cut to fit.  But when I got home I looked at the plans for the kitchen cabinets and saw that the cabinet in front of the seam is the one with the dishwasher and cannot be modified.  The solution is to move the dishwasher to a different location--not a huge problem--but it was lucky I noticed it before the cabinets were built and delivered.

There is still more work to be done on the containers before they are ready for moving.  Metal framing will go in the exterior walls and foam insulation will be sprayed behind the framing and in the floors and ceiling.  The windows will be installed, if they arrive before the containers are to be shipped, otherwise the windows will be installed on site.  

The next time I see the containers will most likely be when they are delivered here.  What a day that will be!!
Guess that about covers everything for now.  I have much more to write about--mainly my search for finishings--but will have to save that for another day.

Thursday, May 30, 2019

The challenge of being "Green"

Where's the train?

In my last (short) blog I reported that I received the updated building permit.  I thought, having received the final approval, the project would proceed "Full Steam Ahead."  But, as usual, my expectations have not been met.   Now the holdup seems to be getting Goliath Tech here to install the helical piles.  The good news is that work is continuing on the containers.  


Here is a picture that James sent me.  As you can see, the openings for the windows on the upper story have been cut out and framed with metal.  The black around the openings is primer to protect the metal from rusting.


While I wait for the site work to move forward, I thought it would be a good opportunity to talk about "green" products.  I've been putting this off for years because it is very complicated.

Being green is not easy because there are so many factors to consider and few, if any,  products meet all the criteria.  For instance, bamboo is considered a sustainable material because it is renewable and fast growing, but most of it comes from China and it takes energy to ship it here.  Also, you might want to think about the manufacturing process--does it use excessive amounts of water, does it use harmful chemicals, are the workers exploited?  The only way to evaluate your choices is to prioritize what is important to you.  Are you concerned more about climate change, sustainability, a healthy environment, or fair-trade and/or ethical production?  And most of us have to include the dollar cost when making our decisions.

In spite of the copious amounts of information on the internet, it isn't always easy to find the answers you need to make informed decisions, but there is hope.  I recently learned about a website that rates products by their energy efficiency with more detail than EnergyStar.  It is called Enervee.com.  If you use their ratings, you will want to look for products with a 90 or better rating.  The Living Future Institute has a program called Declare Products and a long Red List of harmful chemicals.  Companies voluntarily submit their products, so the list is limited but growing every day.  The information available includes such things as chemical content, VOC content, life expectancy, end of life disposition (recyclable or landfill) and Red List free (or not).  There are other certifications, as well, like GreenGuard.


The first task I took on was to figure out what kind of flooring I would use.  As I wrote previously,  I decided to go with reclaimed lumber.  I was pleased to have made that big decision and to be able to move on to other things.  In hindsight, I might have jumped the gun.  I got a call from the suppliers that the wood was loaded on their truck--ready for delivery.  I was not expecting this.  I have no house and don't know when I will.  After much back and forth, I agreed to let them unload it in my driveway (next door to the vacant lot).   While they unloaded the wood, I couldn't help noticing the amount of damaged and unusable boards.  They explained that they were giving me more than I ordered so that there would be enough good wood for the job.  All I can say is I hope they are right.  


 The timing was also bad because they delivered the wood the day before the weather moved into a very windy and wet period.    Though they had attempted to cover the wood pile with plastic, the wood still got wet.

 And so the saga continues.....Will there be enough wood?  What condition will it be in by the time the house is ready for it?  How will the contractor react when he sees the wood?  What will it look like when finished?  Eventually the answers will reveal themselves.

The next decision I needed to make was what cabinets to use.  I think a great green choice would be to reuse cabinets someone discarded, but that is a huge challenge--finding cabinets that would would fit the space, design, etc. and not look like junk, and they could contain harmful chemicals.  I am not considering this for the main house, but it could be a possibility for the accessory dwelling unit.  The ADU kitchen design is very simple so I will be keeping a lookout for cabinets that could fit.

Another excellent green choice is cabinets made from reclaimed, locally sourced wood.  I got a recommendation and estimate and found it to be many times more expensive than other options, making it outside most people's budgets.

The most economical new cabinet option seems to be Thermofoil cabinets.  These are the type of cabinets my contractor uses and is what my cabinet allowance is based on.  They use MDF wood covered with Thermofoil.  Thermofoil is made from vinyl or plastic.  I have 2 problems with this.  First is it's questionable durability.  There are reports of issues with chipping, as well as heat and water damage.  Second, PVC has environmental and health concerns.  The MDF or Medium Density Fiberboard can also contain glues and resins which may be harmful to the environment.  I have ruled this out as an option.

There are other kinds of laminates or veneers used with MDF.  IKEA has a cabinet door made from recycled plastic bottles that I was excited about until I found out that the recycled portion was only a veneer on top of the MDF and it only took 2 plastic bottles to make one cabinet door.  Of less a concern is the fact it only comes in black.  Another company has a veneer made from reclaimed lumber, but again it is only a thin layer on top of the MDF.

So what else is there?  Back to basics--all wood cabinets made and sourced in the USA.  I found a company, MOD Cabinetry, with headquarters in Berkeley, CA that fits this criteria.   They have solid wood cabinets made from PureBond NAUF American hardwood plywood, which means it is "wood sourced from sustainably harvested North American forests and utilizes a soy-based alternative to toxic, formaldehyde-based resins."  I was able to visit their showroom and was impressed with what I saw.  The cabinets I chose are going to be painted with zero VOC paints.   The cabinets will be easy to repair or repaint and should have a long life span.  While they cost more than the Thermofoil cabinets, they are a lot less expensive than the reclaimed wood cabinets.

I will be exceeding the contractor's allowance for cabinets, so I'm trying to save in other areas.   I have been sourcing materials, like tile, on Nextdoor and Craigslist.  More on that for another blog.


Wednesday, May 1, 2019

Full steam ahead!!!!

Image result for steam engine


I got the word yesterday that the city approved the plans!!

That means that work can progress.  The next big step is the installation of the helical piers.  That is estimated to happen in 2 to 3 weeks.  Meanwhile, the contractor will be doing ditch work for the utilities (water, sewer, electric).

I'm tasked with selecting "finishings" and will be writing about my search and decision process.

It is a great relief that our redesigned foundation was approved, but I never allowed myself to consider otherwise.  😁

Image result for Thomas the train

Monday, April 22, 2019

First look at containers

This week has been a quiet one--that is there was no equipment noise.  Further site work is on hold until the structural changes get approved.  I still have my fingers and toes crossed.

I've been weeding along the fences where the graders did not get the weeds.   They didn't get to these weeds because there were things in their way, like the water tanks and materials I have been collecting.  I also did a little site cleanup, though the workers were pretty good at cleaning up after themselves.  One issue I'll have to address with their bosses is the trash disposal.  While my trash bin was empty, they had put their plastic bags of trash in both my green bin and recycle bin.  Being the recycling addict I am, I went through every bag and separated the trash into its proper bin.  Fortunately much of it could go in the green bin as our trash collection company is now collecting compostable things like soiled paper and food waste!!


My son and cameraman

Thursday I woke to sunshine for the first time in quite awhile.  It was a great start to a special day.  My son, Danny, and I were driving to Vallejo to get a close up look at my containers.  I was happy that we didn't have to drive all the way to Sacramento which is where TAYNR's headquarters are.  As you can imagine, finding the space needed to build houses offsite is a challenge.  James Roberts has solved this problem by collaborating with other facilities.  This business is called Transport Products Unlimited.  They rent, sell and modify shipping containers. 


This gives you an idea of the enormity of this facility, but shows only a part of it.
We were met at the site by James and Adrian from TAYNR and were introduced to Mike and Adrian (yes, another Adrian) who work at the site.   We got to see containers, inside and out.  One thing we learned is that not all shipping containers are created equal.  While the basic dimensions are standard, each manufacturer has their own color, flooring, corrugated siding style, locking mechanism, etc.  It is important when using multiple containers that they are the same.  The color and the numbers printed on the boxes help to identify the manufacturer.


James, Mike and Adrian answering my questions and explaining how it all works.

James with me inside half my downstairs living space


Lowering a container to look inside to check the flooring.


Most often, shipping container floors are 1 1/8" marine plywood made from tropical hardwood such as Keruing or Apitong.  These floors are often treated with pesticides so it is recommended to seal them.  I assumed this was done before applying your choice of flooring, but James pointed out that there is another option--using the existing floor as the finished floor.  The 40' containers have a metal plate in the floor at one end which wasn't particularly attractive, but the 20' container floors were all wood.  The containers we looked at had 3 different types of floors.  One was a dark laminate that wasn't particularly attractive.  One was a bamboo floor but it was stained red.  The third was Apitong, if I remember correctly.  We liked the look of it and I decided it would be a good option for the ADU, but James and Mike have to see if they can locate two 20s with that floor.  If they can get the containers, they will sand the floor and seal it with Epoxy.  I had said that the greenest floor was reclaimed wood, but using the existing wood would be even better.


Apitong


Red Bamboo


Laminate


James arranged for some fireworks for us while we were there.  Sparks fly when the metal is being cut. 
Here Adrian is using a plasma cutter to cut an opening in one of the containers.


 It was quieter than I expected, but did smell.


 The plasma cutter made quick work of the opening.  This will be the opening for the sliding glass door off of the downstairs bedroom.


That was the end of our tour.  I got all my questions answered and can't wait to go again to see the progress.


On the way home we stopped at Urban Ore in Berkeley to check out their materials.  It is a giant thrift store for building supplies, as well as some clothing, kitchenware, records and books, etc.  They have hundreds, if not thousands, of doors.  It wouldn't be easy to sort through them to find what you need.  Their kitchen cabinets weren't as nice as those at Habitat for Humanity's Restore in Redwood City, but I'm sure their inventory is constantly changing.  I wasn't expecting to buy anything--we were just getting a feel for what they have.  Danny did find a large hooded fur coat he liked and he bought it for Burning Man.

Friday morning the surveyors came to set markers for the foundation crew to work from.  They have better equipment and expertise to more accurately mark the building corners and elevations.  Juno is enjoying her modified space.


While the surveyors did their work, I was attending a webinar through the PG&E Energy Center.  Whatever you may think of PG&E, they have excellent educational programs for both professionals and homeowners.  Many of the courses are held in San Francisco, but some of them are also available online or on demand.  This class was on Integrated Design Thinking for Net Zero Energy Residential Buildings.  It is a mouthful, but really says it all.  All new homes in California will have to be NZE soon.  The class was about how to do this efficiently and without adding a lot of additional expenses to the project.  One of the best things you can do is to spend more time in the design phase, utilizing the expertise of the various trades in a collaborative way.   A common way to build is more a sequential series of events.  An architect and homeowner come up with a design.  They take it to a structural engineer, then it goes to an energy engineer before going to the building department for a building permit.  Once a permit is obtained, a contractor is hired to build it.  The contractor in turn hires sub-contractors to do the HVAC, foundation, framing, finishes, etc.  With a collaborative approach you get all these people together during the design phase.   For example, to save money they might figure out a way to spend more on insulation that could save on the size of the heating and cooling systems.  The design phase takes longer, but the construction time is reduced because there are fewer changes.  Other suggestions include simplifying the design (such as roof lines), smaller size and fewer windows.

While I didn't have the collaborative design in my project, I will make it a requirement on anything I do in the future.

Here is a great lecture on the subject with an emphasis on affordability:


https://www.youtube.com/watch?v=KvJWCLYqAnA&feature=youtu.be


And here is a written guide authored by the PG&E instructor:

https://energycodeace.adobeconnect.com/aia-zne-guide/


We are expecting to get the plans back from the city this week, otherwise we won't be doing much on site, however, nothing is stopping James and his team with moving forward with the containers.  

Thursday, April 11, 2019

Construction Step One--Excavation

Day 1--

I couldn't sleep last night.  So much going through my mind.  I can't believe this is finally happening.

While we did break ground today, the work was off to a soggy start.  It was a wet Half Moon Bay morning with the fog so thick, it falls from the sky.  While standing in the drizzle, the first hour or so  consisted of introductions, inspecting the site and making a work plan.  The plan was to start clearing the site which was covered in knee high weeds, but there was concern that the big truck would get stuck if driven onto the saturated clay soil.  When I left to walk to my job at the park, they were still debating how to proceed.  I was surprised to see upon my return that they had gotten a good section of the lot cleared of weeds.  They decided to use the small grader on the site to scape the dirt and to keep the truck on the street.  They piled the weeds and dirt in the middle of the lot to move later.  They also located the corner survey markers.


One thing that is unique and special about my situation is that I have a front row seat to the construction as I'm living in the house next door.  I put a fence up to separate the 2 parcels but left the fence boards off the section by the kitchen porch and so I could see out.  This would have worked great had I not gotten a rescue dog, Juno, last year.  Juno loved to run and dig in the vacant lot, but once the work was to start, I had to keep her from going there, so I put up every other fence board--enough to keep her from going through the fence, but open enough to see the work going on.  She seems unfazed by the work, workers, noise, etc.


Day 2--Today we had more rain.  The workers did not bother to show up and it was just as well.  There was standing water on the scraped ground--what a mess!  The black clay soil is like glue when wet.  It cakes to your shoes, your shovels, etc and tracks everywhere.  

One thing was accomplished, however, the delivery of the Honey Bucket, AKA port-a-potty. 

Day 3--After a mostly dry weekend, the surface of the ground has dried out some.  There were a few puddles, but it was definitely workable.  It was a very noisy and busy day with more dirt removal, loading and hauling away.  The downside of being so close to the action is the noise.  I have to keep the doors and windows closed to muffle the sounds.  

While dirt is being moved around, other workers are locating more precisely where the buildings will be with their survey equipment.

Day 4--The last of the dirt was finally removed today.  I'm glad to see that part over with.  I was told they were moving something like 50 tons of dirt.  I can't imagine how much it would have been had we done the original foundation plan.  Then, of course, they have to bring back material to replace the dirt.  Truckload after truckload of base rock is being dumped, spread with the graders and by hand, soaked with water and compacted with a small tamper and large roller.  They only do a shallow layer at a time so the process is repeated over and over again.

This afternoon Hendrik (my younger grandson) went with me to Firewood Farms.  It is a local business that deals in reclaimed lumber from deconstructed buildings, milling of falling trees, wood carvings, etc.  I have been talking with them for several years now about using reclaimed lumber for my floors.  It is probably the greenest flooring option there is.  It is re-using something that would otherwise go to a landfill or be burned, it is locally sourced, is free of chemicals, and so on.  The only real choice they have for wood flooring is 2x6 and 2x8 tongue and groove Douglas fir.  Yes, it is a soft wood and it will scratch, but it will add warmth and character to my already unusual house.  I plan to sand it and finish it with tung oil which is natural and worked great on my son's floor.  

They also have gorgeous big slabs of wood.  I thought that nothing could be more fitting with my California heritage than a Giant Sequoia countertop for my kitchen island.  I put down a deposit for flooring and countertop--2 big decisions out of the way!

Also, today, James sent me pictures of the containers he had picked out for me.  I was surprised that there was no writing on them, but he tells me that "Shipping companies plaster their names on the side and reuse the boxes until they are beat up.  Leasing companies do not.  This is how we get new, 1-way and clean boxes."  


While the site work is going on, the fabrication of the containers will be done in the Sacramento facility.

Day 5--

The noise is incessant and is starting to get to me.  Today it didn't even stop for lunch.  While some workers took a lunch break, others were dumping, grading, rolling, etc.  On and on and on.  But by the end of the day, they had finished this phase of the process.  They loaded up their equipment and left.  I will enjoy the quiet as I wait for the next step. 


While all this work is going on, we still do not have the final approval on the changes we made.  It makes me nervous, but I keep telling myself, it isn't my problem.  This morning I got the latest corrections printed at UPS and dropped them off at the HMB Planning Department.  I have my fingers crossed that they will be approved....and soon.  It is the final piece of the puzzle.


Back when I began this project, I purchased a Brinno TimeLapse video camera.  It comes with a waterproof housing, records onto an SD card and runs on AA batteries.  I mounted it to the back fence and set it to take one frame every 20 seconds, which condenses a workday into about 3 minutes.  So far I'm very happy with the results.  I asked my older grandson, Noah, to help me with the videos and he was excited to do it.  Here is the link to our creation on Youtube.  It runs about 10 minutes, but you can speed it up in settings, if you like.

                 https://youtu.be/5-Nyh5boygU

Enjoy!